
Measure your upper arm before you shop
Your first shopping step is not comparing apps or prices. It is measuring the arm where you expect to use the monitor. Cuff selection is based on mid-upper-arm circumference, not clothing size, body weight, or a visual guess. The American Heart Association advises measuring around your upper arm and choosing a monitor with the correct cuff size.
Use a flexible measuring tape on bare skin. Bend your elbow so you can identify the bony point of your shoulder and the point of your elbow. Find the midpoint between those landmarks, then let your arm hang relaxed at your side. Wrap the tape around that midpoint, keeping it level and snug without digging into the skin. Record the circumference, preferably in centimeters because device ranges are often shown that way. The AHA scientific statement on blood-pressure measurement identifies this shoulder-to-elbow midpoint as the standard location for measuring arm circumference.
Measure again if the tape slipped, twisted, or compressed your arm. If your result is close to a cuff-range boundary, a second careful measurement can prevent a poor match. If you cannot reach the midpoint or read the tape reliably, ask another person, a pharmacist, nurse, or clinician to help. Write down the result before shopping; it is the key specification you will compare with each monitor’s cuff range.
- Measure bare skin at the midpoint of your upper arm.
- Record the circumference in centimeters.
- Repeat the measurement if the tape moves or compresses your skin.
Match the measurement to the exact cuff range
Compare your number with the arm-circumference range printed for the exact cuff. A label such as “standard,” “large,” or “universal” is not enough. The AHA scientific statement notes that cuff dimensions can differ by manufacturer and says cuffs should be labeled with the arm circumferences they fit. Your measurement needs to fall within the stated range for the cuff you will actually receive.
Read the product listing, box contents, user manual, or manufacturer specification sheet. Confirm three details: the exact monitor model number, the range of the included cuff, and whether any replacement cuff you might need is identified as compatible with that model. Do not assume a different cuff from the same brand will connect correctly or use the same operating specifications. If different sources give conflicting ranges, pause and ask the manufacturer, pharmacist, or clinician rather than guessing.
Once the cuff is on your arm, its index or fit marker should land inside the marked range, if the design includes one. That check supports the circumference match; it does not replace measuring first. Remeasure if your arm size changes substantially over time, including during weight loss. A cuff that once fit may no longer be appropriate if your current circumference moves outside its specified range. Features such as Bluetooth, multiple-user memory, data export, or a polished app come only after this basic fit test.
- Use the manufacturer’s numerical range, not the size name.
- Check what cuff is included in the box.
- Confirm replacement-cuff compatibility for the exact model.
Why the wrong cuff can distort your reading
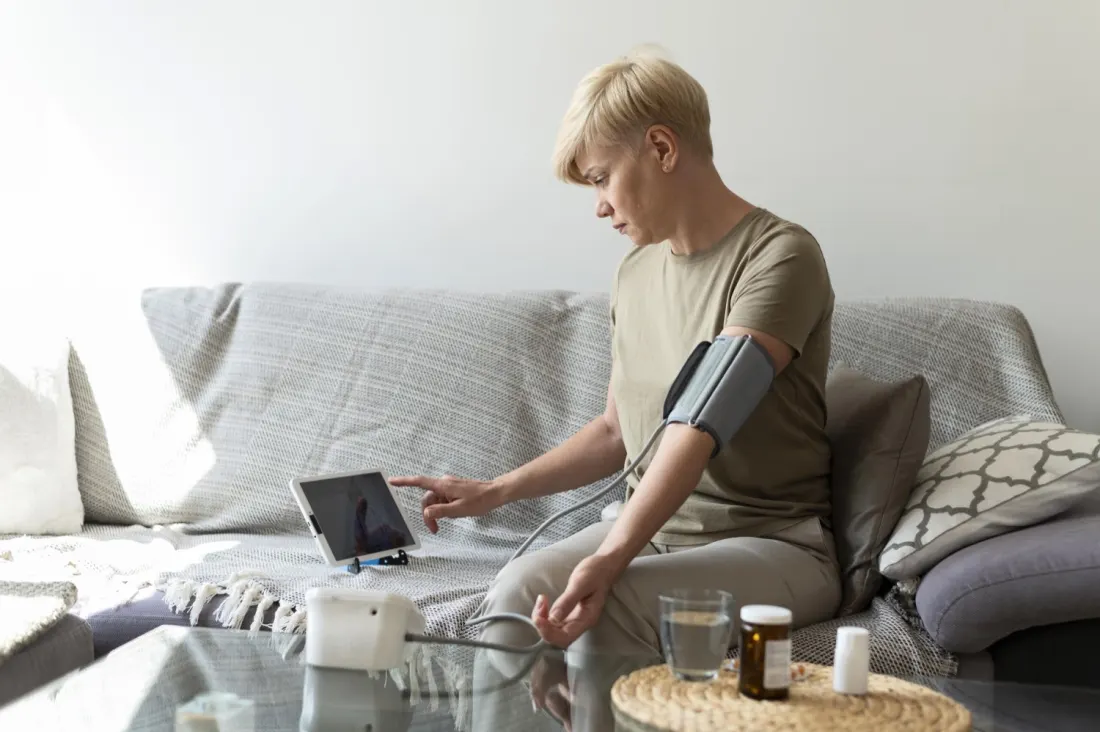
A blood-pressure cuff inflates around your arm while the monitor detects pressure-related signals. The cuff and arm must be appropriately matched for the device to estimate systolic and diastolic pressure accurately. In general, using a cuff that is too small for the arm can push the reading higher, while using one that is too large can push it lower.
The size of the error is not safely predictable. In a 2023 randomized crossover trial of 195 adults, researchers compared a regular cuff with the correctly sized cuff on an automated monitor. Among people who needed a small cuff, the regular cuff—too large for their arms—produced systolic readings averaging 3.6 mm Hg lower. For people who needed a large cuff, the regular cuff was too small and averaged 4.8 mm Hg higher; for those needing an extra-large cuff, it averaged 19.5 mm Hg higher. Those figures describe that study’s conditions, not a correction formula for your monitor.
That is why you should not add or subtract points from a suspicious reading. Replace the mismatch, repeat measurements with proper technique, and share the pattern with a licensed clinician. A validated monitor can still produce misleading results when used with the wrong cuff. Fit and validation solve different problems: validation supports the model’s clinical accuracy under specified testing conditions, while correct cuff selection helps you use that model as intended.
- A too-small cuff can read artificially high.
- A too-large cuff can read artificially low.
- Never try to correct a mismatched-cuff reading with mental math.
Validation is the second buying filter
After confirming fit, check validation. The American Heart Association recommends an automatic, cuff-style upper-arm monitor for home use and advises choosing a validated device. Validation means the model has undergone a recognized clinical-accuracy evaluation; it is not the same as strong customer reviews, a familiar brand name, or extra digital features.
Use the U.S. Validated Device Listing at ValidateBP and search for the exact model number, not only the brand. The listing identifies individual devices and commonly displays the validation protocol, population served, and available cuff range. ValidateBP says documentation for each listed device is reviewed by an independent expert committee against its listing criteria. It also states that listing is not an American Medical Association product endorsement. Because products and listings can change, check the database when you are ready to buy.
Population matters too. The AHA advises making sure a monitor is validated for the intended user when buying for a child, a pregnant person, or an older adult. If no appropriate upper-arm cuff is available, ask a clinician or pharmacist about alternatives. ValidateBP notes that a validated wrist device may be used for certain clinical needs, including when an upper-arm cuff is unsuitable. Wrist technique is especially sensitive: the device must be positioned correctly and held at heart level with little movement or wrist bending.
- Prefer a validated automatic upper-arm monitor.
- Search ValidateBP using the exact model number.
- Ask for clinical guidance when buying for a special population.
Use the right technique after you buy
Correct sizing gets you through the buying decision; correct technique makes the purchase useful. Before measuring, avoid smoking, caffeine, and exercise for 30 minutes, empty your bladder, and sit quietly for at least five minutes. Sit in a chair with your back supported, feet flat, and legs uncrossed. Put the cuff on bare skin rather than over a sleeve.
Support the cuffed arm on a flat surface so the middle of the cuff is at heart level. Follow the placement diagram for your model because cuff markings and tube position can vary. Stay still and do not talk, text, or use the phone during the reading. The AHA recommends taking two readings one minute apart and recording both; the CDC similarly recommends at least two readings, one or two minutes apart. Ask your clinician what monitoring schedule makes sense for you instead of creating one from a single unusual result.
Bring the monitor, cuff, and saved readings to a medical appointment. A clinician can check the fit, watch your technique, and compare the device with office equipment. The AHA suggests bringing the monitor about once a year or as the manufacturer directs. Home monitoring can help show patterns and support clinical care, but it does not replace regular visits. Do not stop, start, or change blood-pressure medication because of a home reading without speaking with the clinician managing your care.
- Rest quietly before measuring.
- Keep your back, feet, and cuffed arm supported.
- Record multiple readings instead of reacting to one number.
Understand the numbers and the safety limits
Accurate equipment matters because a few points can place a reading in a different adult blood-pressure category. Under the current ACC/AHA categories, normal is below 120 systolic and below 80 diastolic. Elevated is 120–129 systolic and below 80 diastolic. Stage 1 hypertension is 130–139 systolic or 80–89 diastolic, and stage 2 is 140 or higher systolic or 90 or higher diastolic. The CDC uses the same 130/80 threshold when describing high blood pressure. These categories organize readings; a licensed clinician confirms a diagnosis using appropriate measurements and clinical context.
Look for a pattern rather than trying to interpret one number in isolation. If a result seems unexpectedly high or low, check that the cuff is the correct size, your arm is supported at heart level, and you followed the preparation steps. Record the result and repeat it according to established guidance rather than using mental math to “correct” it.
There is one important safety limit. The AHA says that if blood pressure is higher than 180 systolic and/or 120 diastolic, wait at least one minute and measure again. If it remains that high, contact a health professional promptly. If a reading above 180/120 occurs with chest pain, shortness of breath, back pain, numbness, weakness, vision changes, difficulty speaking, or another new concerning symptom, call 911. Troubleshooting a cuff must never delay emergency care.
- Adult hypertension begins at 130 systolic or 80 diastolic.
- One reading alone does not establish a diagnosis.
- A reading above 180/120 with concerning symptoms requires emergency help.
Common questions
What if my arm measurement is exactly at the edge of the cuff range?
Repeat the measurement carefully and follow the manufacturer’s stated range and fit-marker instructions. If the result remains on the boundary or the cuff does not wrap as directed, ask the manufacturer, a pharmacist, or a clinician before relying on it.
Can weight loss change the cuff size I need?
Yes, if your upper-arm circumference changes enough to leave the cuff’s specified range. Remeasure periodically during substantial weight loss—including weight loss while using a GLP-1 medication—and whenever the cuff’s fit indicators no longer align.
Does a validated monitor guarantee an accurate home reading?
No. Validation supports the accuracy of a specific model under defined testing conditions, but cuff size, placement, body position, preparation, movement, and talking can still affect your measurement.
This information is for education only and is not medical advice, diagnosis, or treatment guidance. A licensed clinician can help you select equipment, interpret readings, and decide when medical evaluation is needed.